2013-06-21
Steph and I got down early enough from Firebird Ridge the day before that we were well rested and up early for round 2 on Norman Clyde Peak's classic Twilight Pillar Route. We had left our rack, rope, crampons and axes at the base on our descent the day before, so the approach was much more casual.

Visit on googleusercontent.com
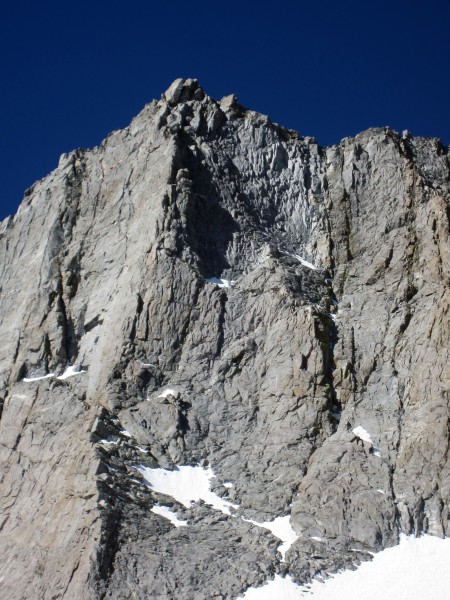
Day 3 we climbed Twilight Pillar on Norman Clyde Peak from a high camp.
Surprisingly, I think the crux of the route was finding the start, as in the end I decided that the most prominent dihedral was NOT the way to start! I found a better start that steps into it higher up. The crux was tougher than I expected - harder and less secure than anything on Firebird Ridge, so I would call this route either 5.9, or Firebird Ridge should be downgraded to 5.8 or 5.8+. I liked Firebird slightly more, although this one had more sustained climbing and exposure, but was much shorter and had a lot more loose rock. Still, you've always got to appreciate a line that tops out directly on the summit!
Approach
The approach went faster this day, naturally, as we were better acclimatized and knew the way more precisely. We did, however, find a way to make it to the col easier from our descent the day before, so we used that variation and saved some effort. That was by traversing closer towards Norman Clyde Peak to gain a narrow access ramp and then traverse back up and right. This replaced the first 100' of cl. 3 scrambling with a mostly cl. 2 stroll. Steph was feeling fresher than me this day, so she ran ahead. I caught up to her napping by where we had left our gear from our climb yesterday, at the start of the large snowfield.
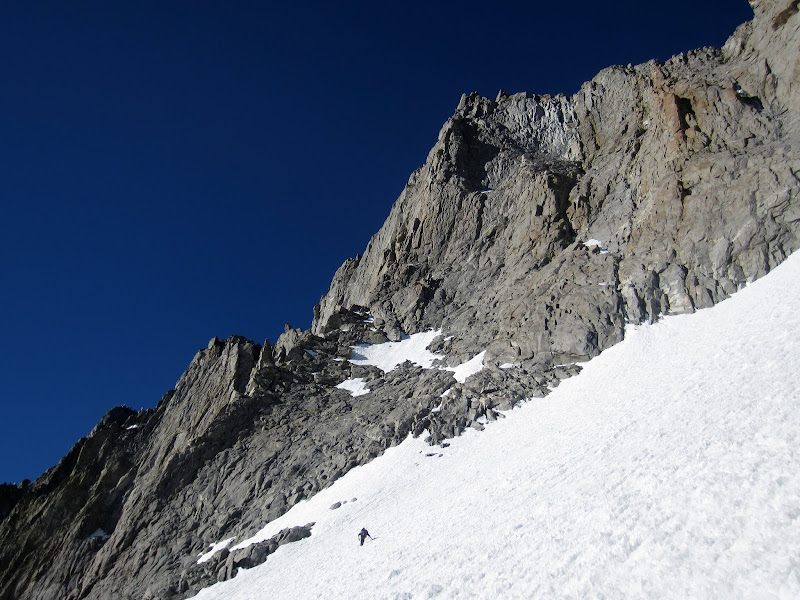
As imposing as the snowfield looked from a distance, it is actually fairly mild. I imagine it depends on snow cover, but it seemed to me that if you fell on it, you might not sail off the lower cliff band. Still, an ice axe is mandatory and crampons recommended.
Visit on googleusercontent.com
Crossing the snowfield to Twilight Pillar
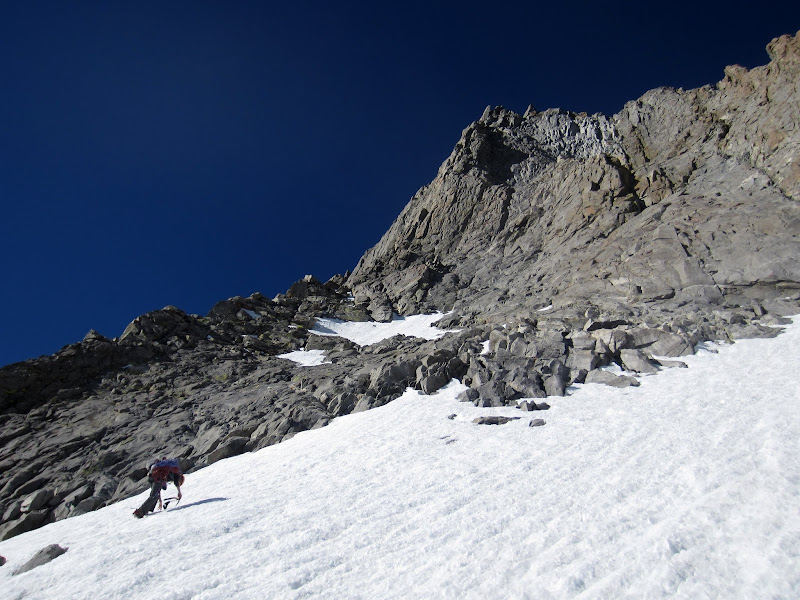
As we neared the end of the snowfield, we picked our way up to what looked like the best entry to the slabs approach scramble. From researching the route I gathered that this part was sketchy cl. 4 slab scrambling, and runout. I agree that there aren't many places for pro if you wanted to rope up, but the climbing wasn't too insecure, and had many rests and ways to go. So it is fairly casual if it is within your soloing comfort zone.
Visit on googleusercontent.com
Steph nearing the slab scramble above the snowfield
The slabs require some careful routefinding, but in general, aim for the highpoint of the lower rock apron, just below the prominent series of dihedrals. You should reach the edge of the apron just at the base of the dihedrals. This edge drops off much more steeply on the backside, so the start really is more like beginning on an arete.
Visit on googleusercontent.com
Scrambling up slabs to Twilight Pillar
As Steph is more comfortable soloing than me, she sprinted ahead on the slabs, and I caught up to her at a roomy perch just beneath the dihedrals.

Visit on googleusercontent.com
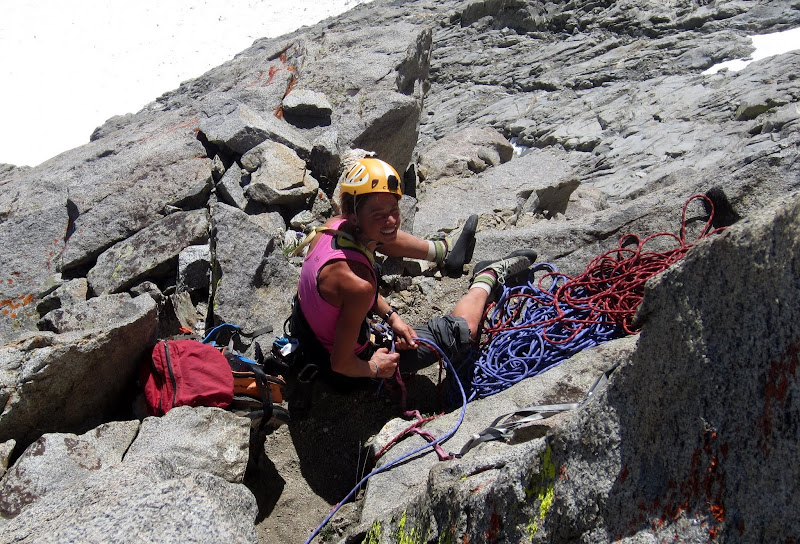
Steph waiting at the start of the climb. She's so hard to keep up with!
Visit on googleusercontent.com
Steph belaying P1
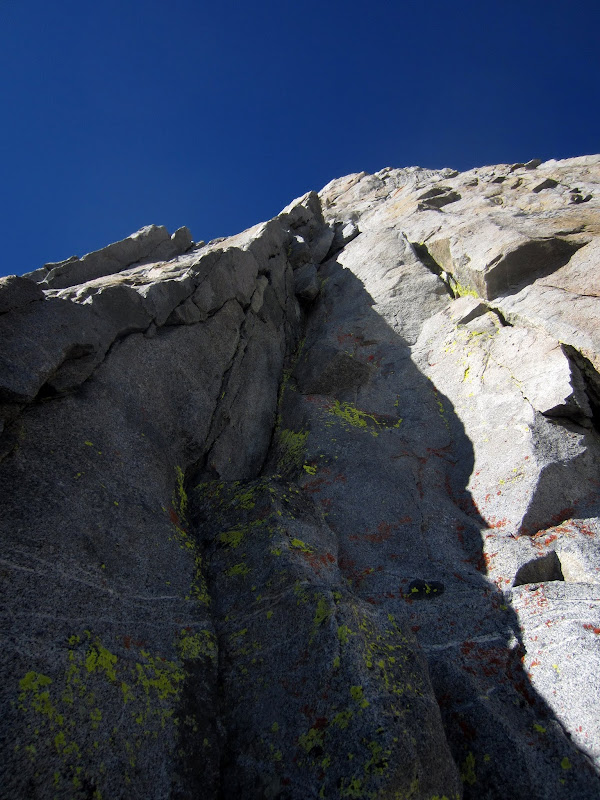
We lost a lot of time in the beginning, as the route descriptions I had found didn't describe the start too clearly. Most relied on mentioning a fixed cam in the starting dihedral, but I never found any fixed cam on the route. I started out ascending the largest dihedral, which seemed the most promising, but it turned out to be much harder than it looked! Steep, slick, and no cracks ... just a seam. I wasted a lot of time climbing partway up and down this, deciding not to commit to the questionable, unprotectable strech that looked harder than 5.8. I considered the wide crack on the right, which seemed stout for 5.8 but was at least protectable, but I couldn't tell if I could get back into the dihedrals from that crack higher up.

Visit on googleusercontent.com
Starting P1. I thought I was supposed to go up this largest corner. This didn't seem right, and in the end I found a better way up the smaller corner on the left, stepping back right into the big corner for the last half of the pitch.
Visit on googleusercontent.com
P1 - don't take this corner.
After waffling for about 40 minutes, I finally committed to a shallower dihedral to the left. It didn't seem right from the route descriptions, but it worked out just fine, protected well enough, and seemed to be about 5.7-5.8. (It felt on the harder side, but I could tell this was due more to the nervousness of not knowing what I was climbing into rather than the actual technical difficulty).
The shallow dihedral ended at a nice ledge that traversed back into the main corner system where, by now, a crack had appeared, making it protectable and easy to climb.

Visit on googleusercontent.com
P1 Stepping into the corner midway up, where it is a cruiser 5.7+.
The dihedral ends in an imposing slanting roof with an offwith, by you can climb a bit to the side of it before stepping left onto a small and airy belay ledge.

Visit on googleusercontent.com
P1 reaching the roof and step left to the belay ledge.
Visit on googleusercontent.com
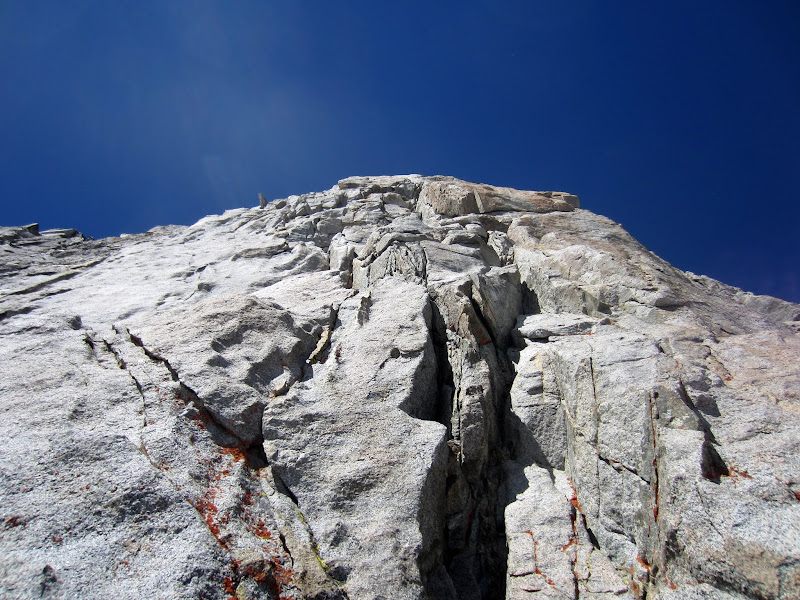
P2 face and crack climbing to step right at a small ledge with a piton. This was the crux pitch, with somewhat insecure 5.9 stemming at the end. To me it seemed harder than the 5.9 crux on Firebird Ridge.
Once again, on P2 there was some uncertainty on the way to go - at least lower down. The way left looked to be about 5.4, but there was no gear for the first 20' or so, and it was very exposed. I opted for the harder-looking corner that climbed straight up, as it had gear options. It felt to be about 5.6.
Visit on googleusercontent.com
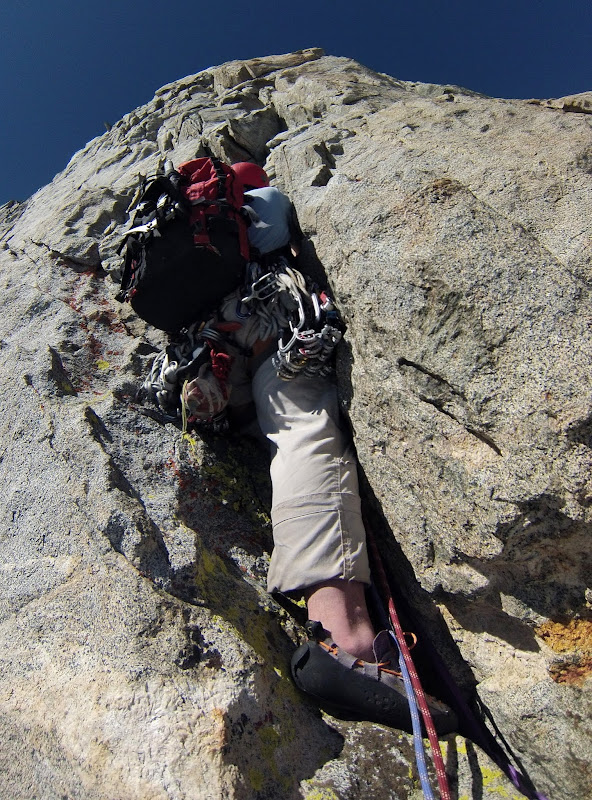
Leading P2 (by Steph Abegg)
The 5.6 corner ended at a large flake, and from here the corner became much steeper. The crack was not longer very good for jamming and was mostly bottomed out, flaring, and rotten, but the corner had lots of crimpy holds and stemming options. It felt sustained at 5.8, then there was a stretch were you had to step on a narrow hanging corner (Steph's left foot is on it in the photo below) with very marginal hand holds and small gear. It felt about 5.9 after being tired from sustained 5.8 stemming.

Visit on googleusercontent.com
Step finishing the P2 crux. Note her stemming that hanging corner. Interesting climbing here!
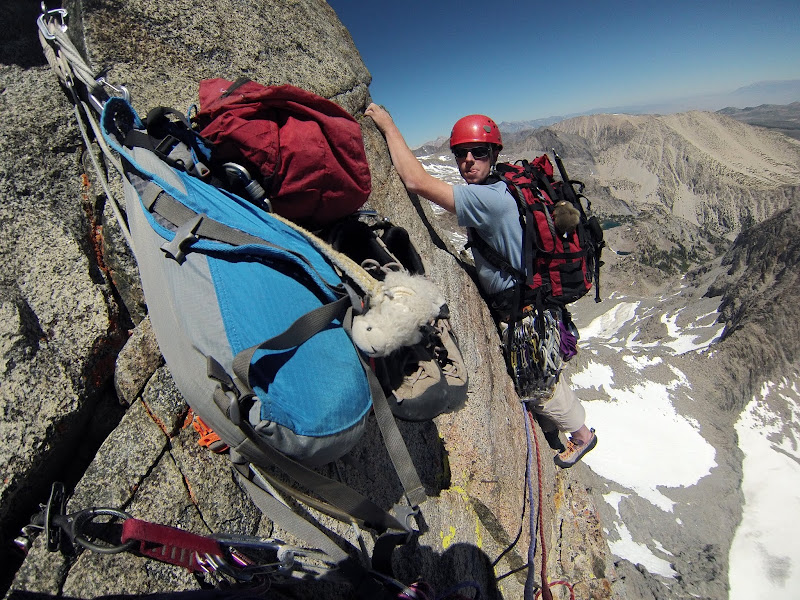
Even more abruptly than on P1, a small airy ledge appears to the side, but this time it is on the right, and is much flatter and smaller. There is a piton and a horizontal crack to take gear. The crack continues up here through a roof. Some people have gone this way and found it very hard. Others spoke of an improbably traverse to the right into easier corners. This was the ticket!
It is improbably in that it doesn't appear to lead anywhere, and it is a bit thin. The leader should run it out to avoid horrendous rope drag as they ascend the next corner system.
Visit on googleusercontent.com
Doing the improbable step right on P3. (by Steph Abegg)
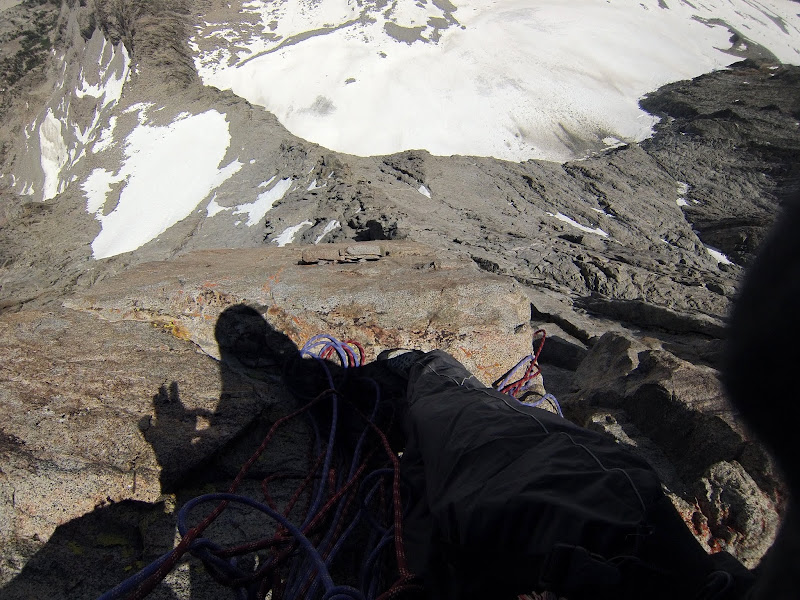
One of the things I'd say that stuck out to me about Twilight Pillar is that the belays and climbing on the first couple of pitches felt far more exposed than anything else I have climbed in the Palisades. Even with the steepness of the first buttress on Dark Star, belays were usually at pretty good sized ledges. This route felt airy!
Visit on googleusercontent.com
Looking down from the exposed P3 belay - a tiny but perfectly flat ledge. (by Steph Abegg)
Visit on googleusercontent.com
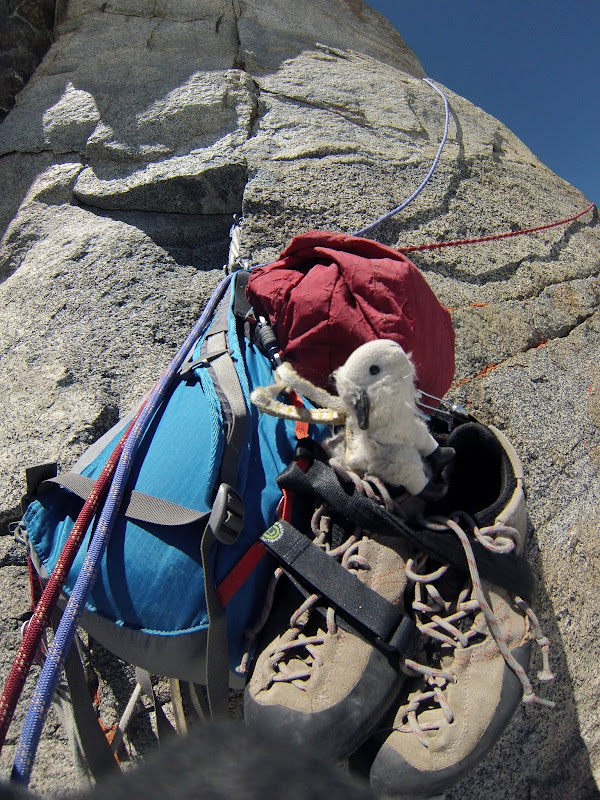
Billy at the P3 belay. The piton is below that little roof. (by Steph Abegg)

Visit on googleusercontent.com
Looking back on the improbable step right. A little higher and I'll dare place gear without death drag!
Visit on googleusercontent.com
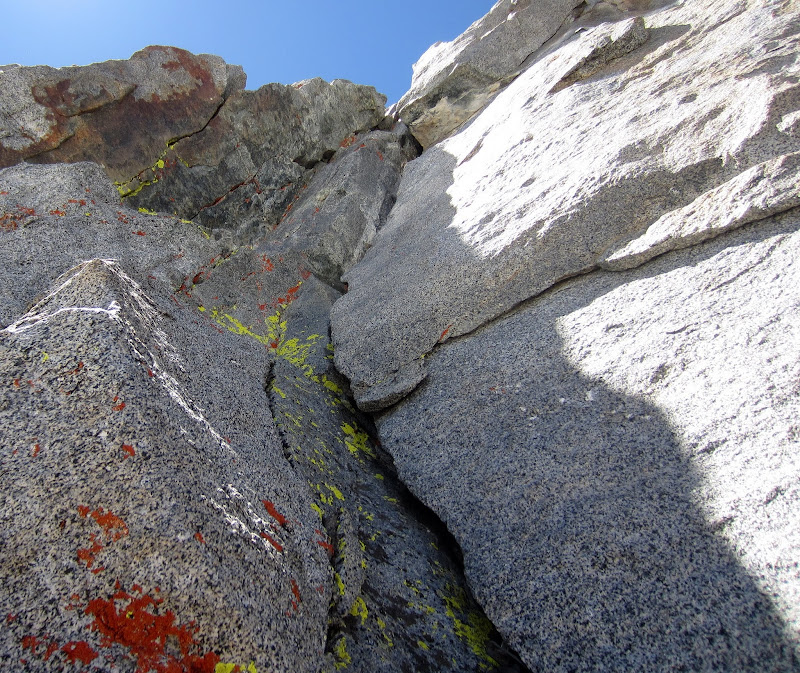
P3 5.7+ corner. Really fun hand jams and stemming, although the rock gets loose above as the terrain gets easier.
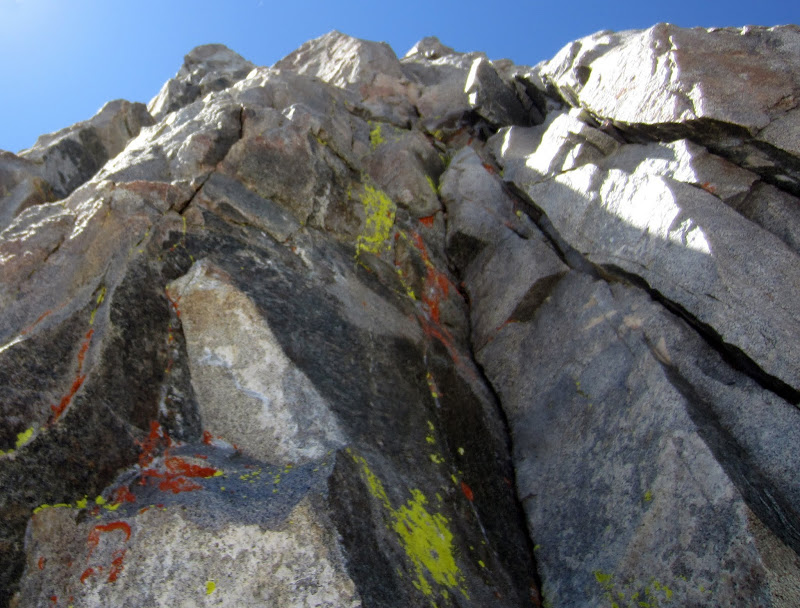
After racing up a fun lieback and jamcrack corner, the terrain eased up into a series of tiers. The easiest line seemed to traverse two dihedrals over, ascend a bit, then traverse back up to a belay ledge. Here and there the rocks were loose, but nothing too bad for alpine. I'd rank it as somewhat better than Temple Crag.
Visit on googleusercontent.com
Looking up the P3 'triple dihedrals'. I worked my way right, and eventually all the way back left, before finishing in the center. Mostly bouldery cl. 4 to low 5th, with the occasional 5.7 move, but with enough loose rocks to keep one wary.
Visit on googleusercontent.com
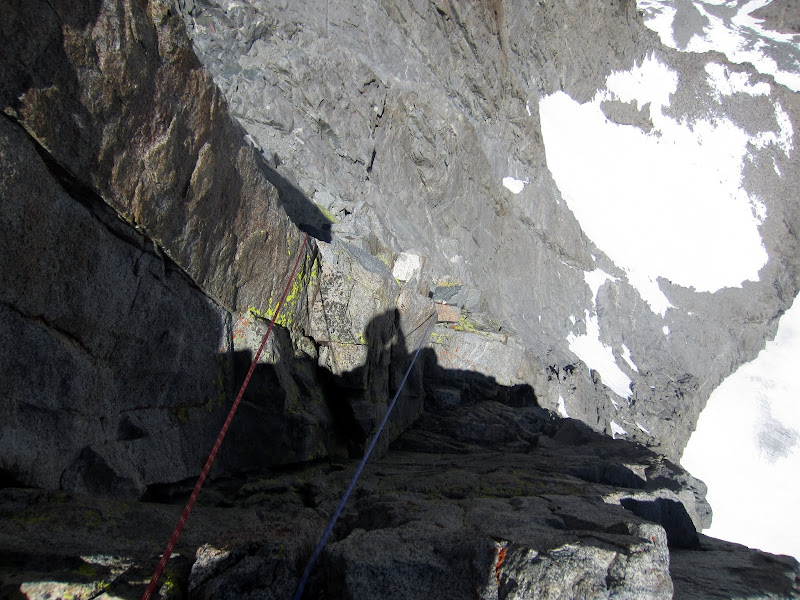
Looking down the P3 'triple dihedrals' from the belay.
Visit on googleusercontent.com
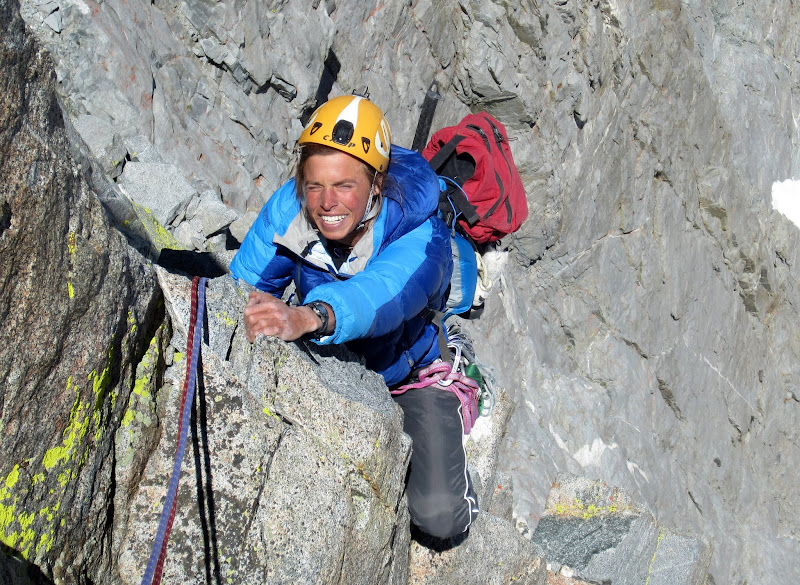
Steph following P3.
[Click to View Linked Image]
The Thumb, Ed Lane Peak, Birch Mtn and South Fork Pass
From here on the climbing was supposed to be easier and less interesting. The position still made it fun, though. Steph felt up for leading these sections, so she took off to lead P4.

Visit on googleusercontent.com
Me belaying Steph as she leads P4 (by Steph Abegg)
It was a strange pitch as it enters a very wide slot, about the size of a city sidewalk. Normally you could just walk through it, but it was still filled with snow, so we did a combination of body-bridging and face climbing on one side. At the end the climb ascends broken corners and blocks up and left, back towards the prow of the pillar on easy terrain.

Visit on googleusercontent.com
Following through the passage on P4.
Steph was good to go on P5, but she had some issues, climbed slow, and stopped short. I didn't see a better way to go, so either this was it, or perhaps one should traverse more to one side or the other? Either way, going this was was still only about 5.8, but physical and awkward - especially if leading with a pack. Steph tied hers off to finish the step, then hauled the pack up once I got closer. From here it was a very easy walk and scramble around the summit block. Bruce Bindner had mentioned a 5.10a direct topout. I wonder if that ascended the OW behind the flake in the photo below?

Visit on googleusercontent.com
Steph led out on P5 and stopped short, as this crux was quite tough for her, and she left her pack for hauling. She belayed me up (it was a pretty awkward and strenuous 5.8+ corner), and then finished by traversing right on a very casual and short P6 that topped out directly on the summit.
The route wraps 90 degrees around the summit then shoots straight for the top, ending right at the register. I love routes that do that!
Visit on googleusercontent.com
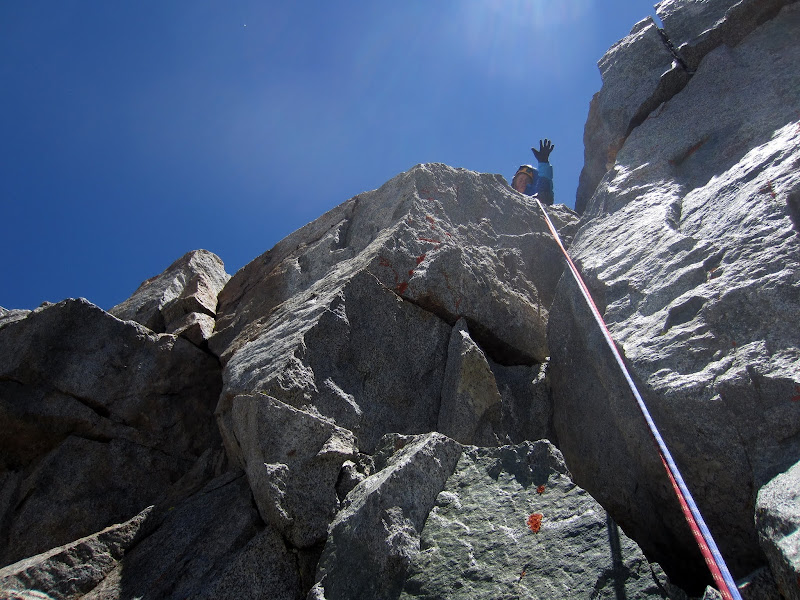
Steph atop the summit of Norman Clyde Peak.

Visit on googleusercontent.com
Middle Palisade seen from Norman Clyde Peak
The prior day we didn't climb to the summit as Firebird Ridge tops out a ways down the ridge, and we had wanted to make sure that we had enough time to figure out the descent with daylight. Today we lounged a bit on the summit for a snack, and I couldn't resist pressing Steph's patience to get moving as I rummaged through the summit register. The Norman Clyde Peak register goes back a ways and has a lot of interesting entries, including a number of surprises from people I know personally or through some of the online forums.

Visit on googleusercontent.com
Summit Register - Peter Croft x2
Visit on googleusercontent.com
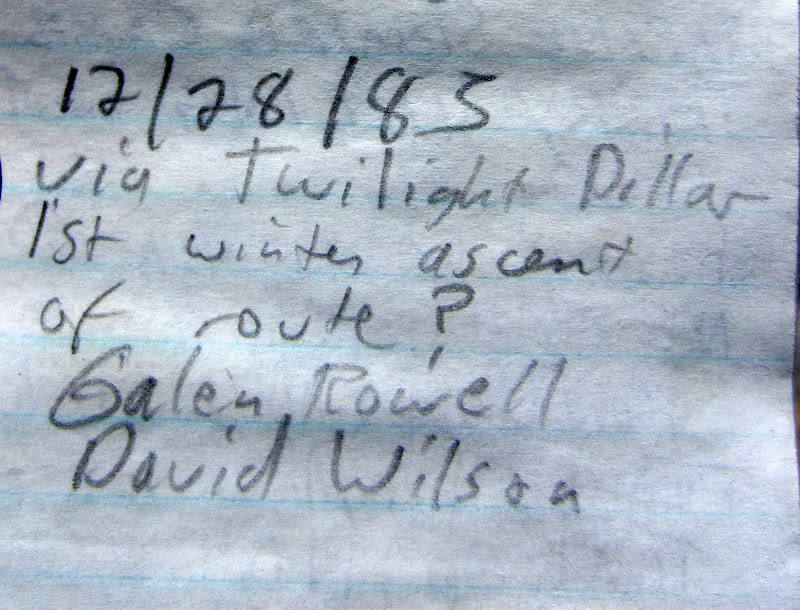
Summit Register - Galen Rowell Winter Ascent

Visit on googleusercontent.com
Summit Register - Traverse from S Fork by John Fischer
Visit on googleusercontent.com
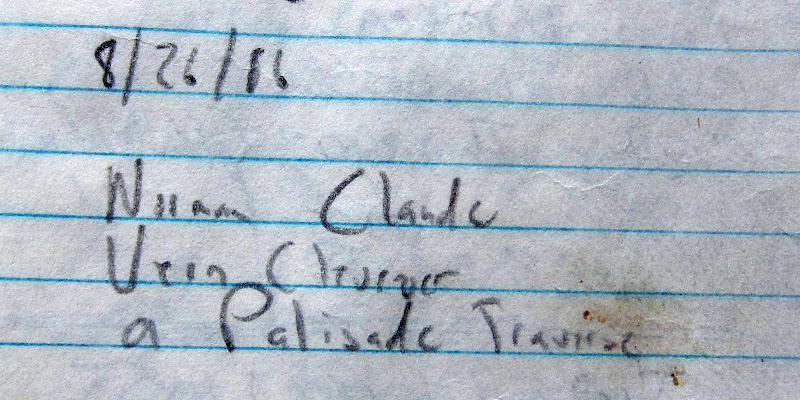
Summit Register - Palisade Traverse - Norman Claude and Vern Clevenger

Visit on googleusercontent.com
Summit Register - Palisades Solo Traverse - Sam Skrocke

Visit on googleusercontent.com
Summit Register - Bruce Bindner

Visit on googleusercontent.com
Summit Register - Bruce Bindner on Thunderbird Wall
Visit on googleusercontent.com
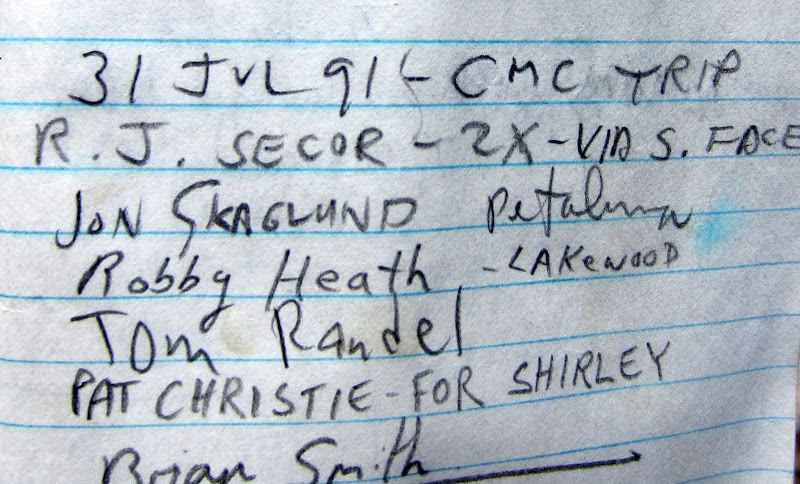
Summit Register - RJ Secor
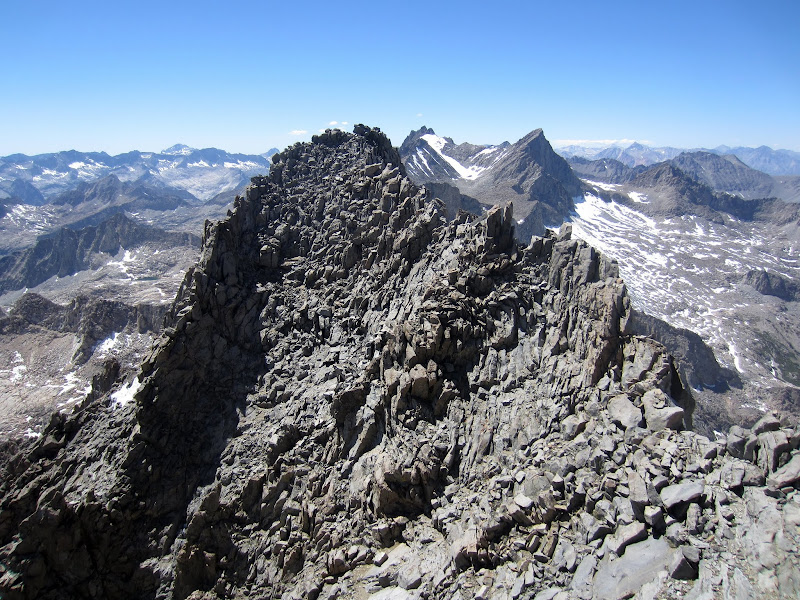
It took us about 20 minutes to traverse from the summit to the top of Firebird Ridge. This begins by first heading the other direction, towards Middle Palisade, and then wrapping 180 degrees around on ledges to some downclimbing, at cl. 4. From here there is an easy cl. 2-3 ledge system that traverses to below Firebird Ridge, then cl. 3 blocks ascending about 100' back up to the crest. (You might be able to traverse straight over staying higher on the crest, but this looked to be harder than cl. 3-4 to us!)
Visit on googleusercontent.com
Looking over to Firebird Ridge and the NE Face descent. Getting over there was quite the exposed scramble!

Visit on googleusercontent.com
Finishing the crux summit downclimb. (by Steph Abegg)

Visit on googleusercontent.com
Looking back to the summit as we ascended back up to the top of Firebird Ridge. You can see the leaning pillar that I was downclimbing by in the previous photo.
Once we reached the ridge crest we were on familiar ground again, as this was the topout to Firebird Ridge, and the NE Face starts/ends about 50 ft farther along the ridge crest.
Naturally, having ropes and being lazy, we opted to rappel the upper section again.

Visit on googleusercontent.com
Steph rigging the rappel.
Since we were already familiar with the descent, we made it down much faster, making it from the first rappel to camp in about 3:45. We couldn't avoid opting for a second rappel partway down, even though this time we stayed farther skier's left, but this time the rappel was much easier, and the climbing overall was a bit easier.
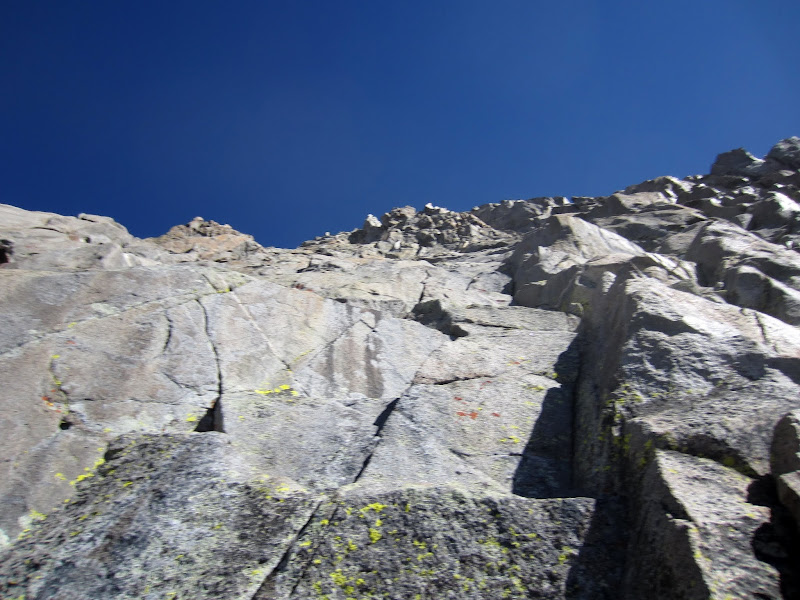
Visit on googleusercontent.com
Looking back up the NE Face as we did the long downclimb again. This time we did it faster!
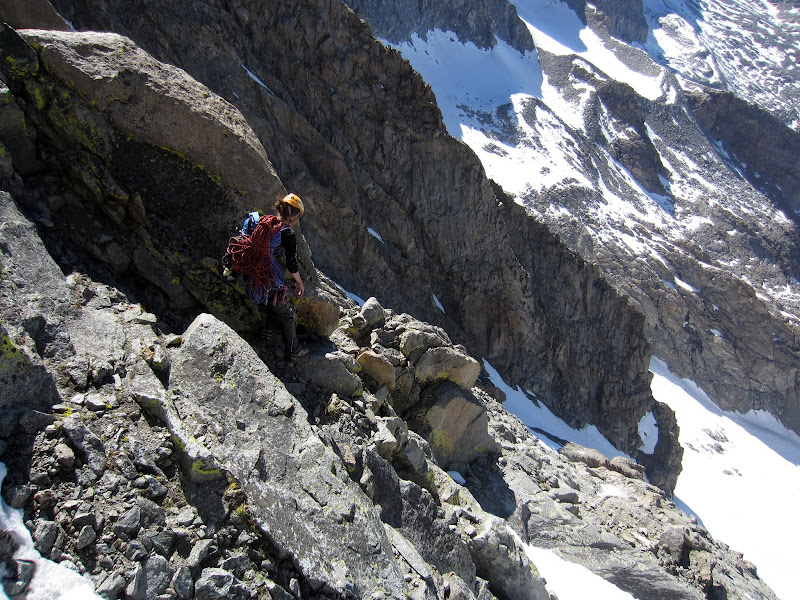
Visit on googleusercontent.com
Steph downclimbing the NE Face.
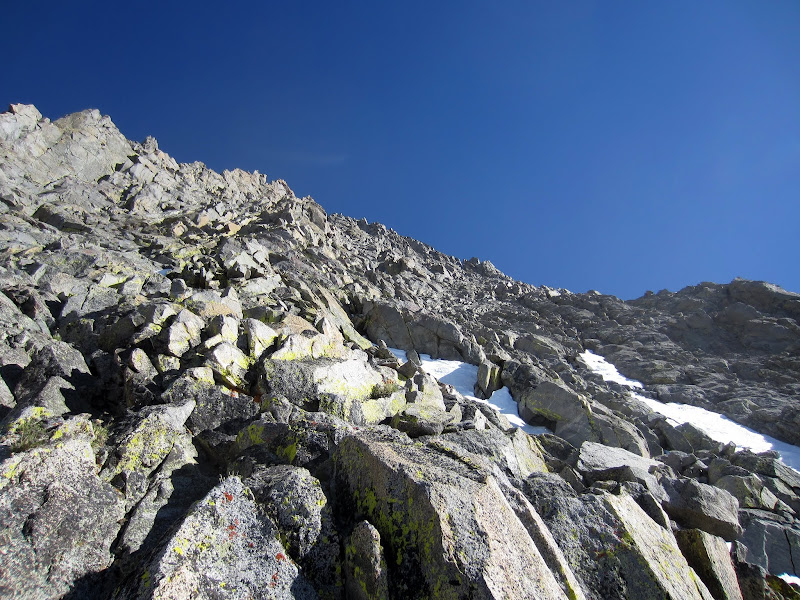
Visit on googleusercontent.com
Looking back up near the bottom of the NE Face.
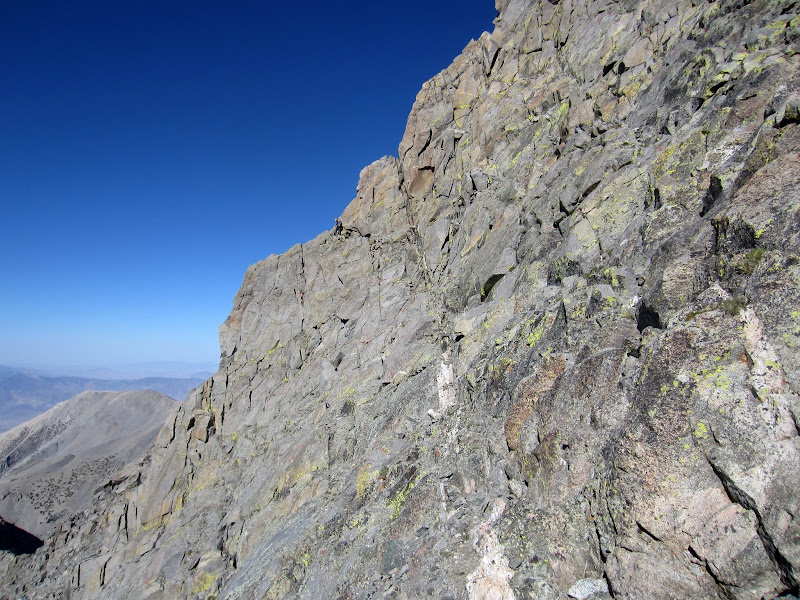
Visit on googleusercontent.com
Steph exiting the base of the NE Face.
The entire route took us 13:30 camp-to-camp from our high camp. While not a long route, between the approach, descent, and routefinding, it was along day! The next day would be more relaxed, as all we had in store was moving camp over the "Firebird Col" to the base of the Palisade Crest to continue our adventure.

Visit on googleusercontent.com
Middle Palisade and Norman Clyde Peak under full moon
Route Topo and Annotated Photos
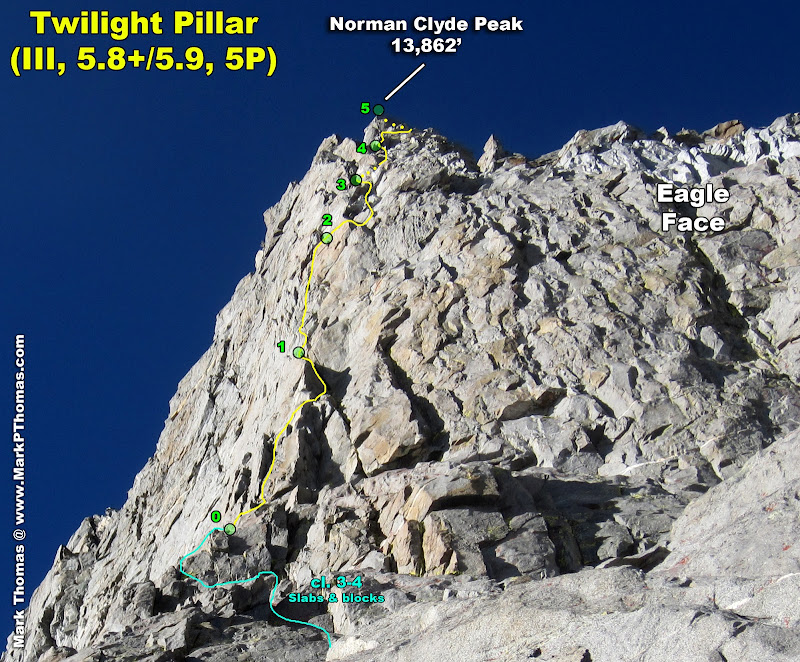
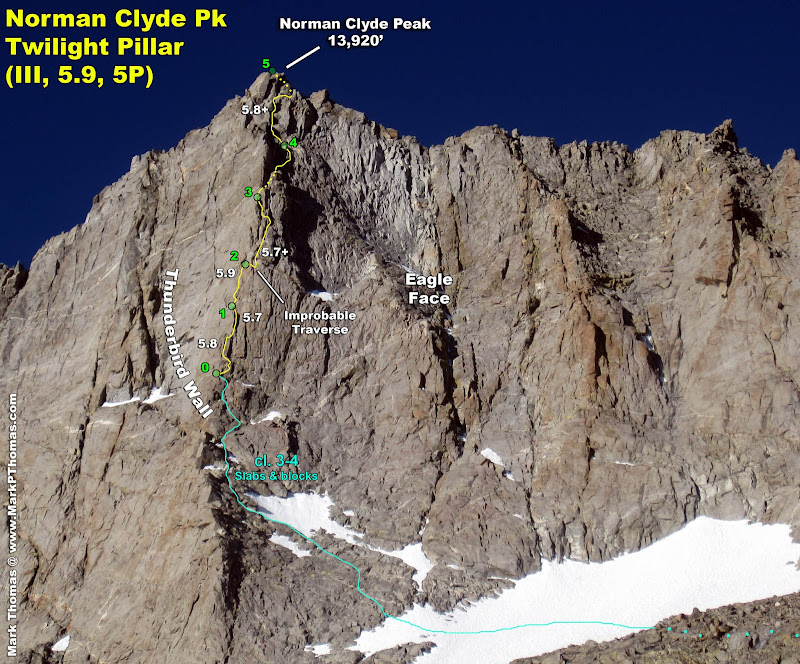
Below is my first completed drawn topo of a route. I decided Twilight Pillar could use one. (BTW, in case you're wondering what I mean when I say 5.7+ or 5.8+, I mean that I feel it was pretty stout for 5.7/5.8, maybe very old school, but I didn't want to rate it the next number higher.)

Visit on googleusercontent.com
Climbing topo of Twilight Pillar on Norman Clyde Peak.
Visit on googleusercontent.com
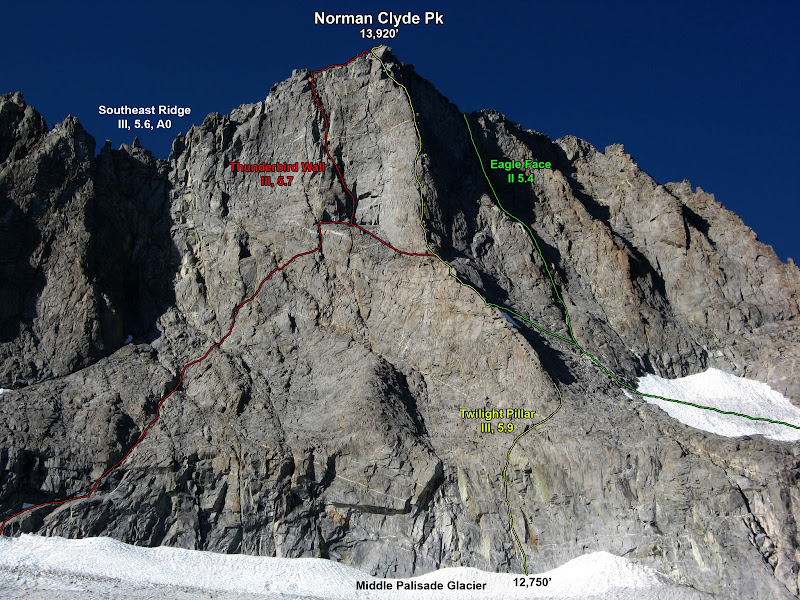
Routes on Norman Clyde Peak. The lower pitches of Twilight Pillar are my best guess from looking at the rock and referencing Secor. Same with Thunderbird Wall and Eagle Face. I think Twilight Pillar's lower pitches might actually start farther right now ...
Visit on googleusercontent.com
Twilight Pillar route on Norman Clyde Peak.

Visit on googleusercontent.com
Twilight Pillar route on Norman Clyde Peak.

Visit on googleusercontent.com
Twilight Pillar route on Norman Clyde Peak.

Visit on googleusercontent.com
Twilight Pillar route on Norman Clyde Peak.
Personal Website
