After completion of Sierra Challenge 2010, my goal was to do more technical climbing and to work on my trad skills. Not too many ranges in the world can compete with what Sierra has to offer-high altitude, rugged peaks, beautiful scenery, load of routes of all difficulties, and usually stable weather. A week after leading 5 pitches on Half Dome's Snake Dike (5.7) I decided not to pass on the opportunity to climb Mount Conness (12,590 feet). After reading about North Ridge (5.6) and West Ridge (5.6) of Conness, it was difficult for me to decide on the route- both seemed equally as awesome. But, after checking out some of the exposed "hero shots" from North Ridge and talking to several people that have done both ridges, the deal was sealed-North Ridge it is!
I left the Bay Area fairly early Friday, and was able to squeeze in a brief hike around Saddlebag Lake, than got some needed rest for the day to come.
Approach
During the night to my surprise I didn't sleep well (maybe due to driving from San Francisco to over 10,000 feet, or due to forgetting to bring my favorite sleeping pad) and the temperature reached below freezing (surprise!). However, I did not have any trouble getting up in the morning. Instead of waiting for the boat ride across Saddlebag Lake my two partners and I decided to hike- our cold bodies begged us to get our blood flowing again. After we left camp we chose to take the trail on western side of Saddleback lake (10,080 feet) going north. Disadvantage of west side are a load of loose rocks on the trail which could easily result in a twisted ankle. East side has a better trail, but adds on extra distance and time to the hike. Before Saddlebag lake ends there is a left (west) turn we took, and passed Greenstone lake on it's South side. The trail was very straight forward and easy to follow, but map is required to avoid getting lost. After we passed Greenstone lake the trail crosses the stream (to the north), and continues to lead the climber north-west along a creek, over some slabs, towards Conness lakes, glacier, and mountain itself.
[
Click to View Linked Image]
Conness lakes scenery
The approach was very scenic, and I was able to spot little fish going crazy around these streams, especially in first couple of Conness lakes.
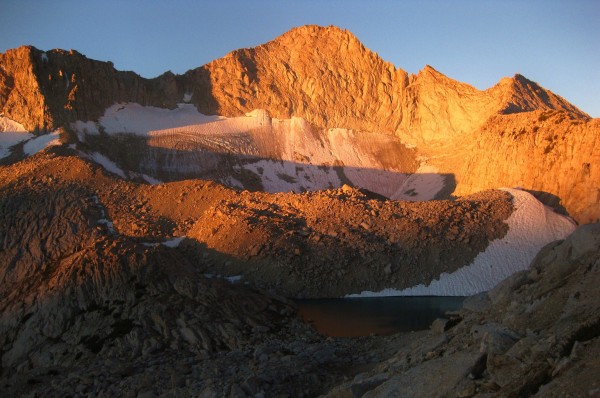
As we passed lake after lake the scenery only got better. North ridge came into view- a beautiful thousand foot granite wall towering over Conness glacier. We followed the lakes on their north side. At this point route is easy to follow, and only at one spot we had to get over some slabs to join the trail on their other side. After we approached the last lake we filled up our empty water bottles and filled up our stomachs with fresh Sierra glacier water. To the right (north) of lakes there is a scree slope with numerous trails going up it and towards North Ridge of Conness.
[
Click to View Linked Image]
On the scree slope. Traversing towards the ridge
We took one of these trails up and traversed northwest (towards the ridge) to the beginning of North Ridge. At the base of the route we got in some calories and had a rest stop. I noted we are making great time, and other folks that were a bit behind are out sight. It took us only two hours to get to the ridge.
[
Click to View Linked Image]
Route and I
The Climb
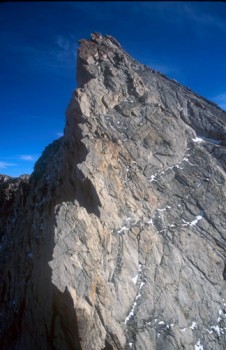
I don't believe I ever approached an alpine route and found it to be as perfect as North Ridge looked. As the ridge continues the terrain gets narrow and more difficult. Like a pair of giant guards two towers stand in the way of any climber that dares to set their foot on this beauty. From the distance the towers look very intimidating and difficult to get around.
[
Click to View Linked Image]
Two intimidating towers
We made our way to the first tower, starting from second class terrain, which transformed into 3rd class with exposure. As we approached the 1st tower our route ran into couple of 4th class moves and to get around the 1st tower (on it's left side) we got a bit higher than 3rd class ledges and had to make a exposed and airy 5th class move over the drop on to the glacier. As we approached harder terrain our pace slowed down, but we still were making a good time since we decided to climb unroped (all 3 of us were comfortable on this terrain in our climbing shoes).
[
Click to View Linked Image]
Start of 3rd class
[
Click to View Linked Image]
Little past the first tower
After we managed to get up to the top of second tower we decided to use the webbing at the rap station and get down quick, in order to save time. We put on our harnesses and flaked out the rope. Before raping down we enjoyed some of the exposure and the views. Looking back at our route I thought about "What would my Mom say is she saw this, FROM THIS EXACT SPOT?!" From the top of second tower we were able to pick a nice line to take up to the summit. As we got ready to take turns on the rap station I noticed the party behind us starting up the ridge. As we took turns getting down, we noticed that there were actually 3 rap stations on the way down, possibly to allow a party with a 30M rope to safely get down. We skipped the station in the middle and were down in the saddle between second tower and the summit shortly after.
[
Click to View Linked Image]
Rap down from 2nd tower
From the saddle to the summit the route was class 4 to 5. easy, even though if one really wants I am sure there is a class 4 line available somewhere. The climb from the saddle starts out with easy slab climbing, than gets steeper with more than a few cracks available for holds. Half way up we decided to stop and snap couple of hero shots.
[
Click to View Linked Image]
*Peter Croft wanna-be* shot
[
Click to View Linked Image]
Hanging over a 1000 ft drop
On this ridge it is not difficult at all to find an exposed spot for a few hero shots, the whole ridge is exposed! As we were getting done with our photo session we spotted the other party getting up to the second tower. We waved to them, and continued up. As we continued up the climbing got more fun. At one point we had to climb down a 10 foot chimney, and than climb up a nice hand crack. After couple more minutes and another exposed traverse we were approaching the summit. It was only noon on Saturday and my big weekend plan was already complete! I pulled out my celebratory skittles and enjoyed the view from the top. We took some summit photos, rested and attempted to wait for the following party a bit longer.
[
Click to View Linked Image]
summit photo (group)
After waiting for about thirty minutes we went down to find the chute leading down to West ridge (another classic). It took us about an hour to find the right chute, and by than we decided not to try our luck on this day. Climbing four or so roped pitches with three climbers would make things a lot slower, and we would be risking an epic. We decided to avoid one and take the East ridge (class 2) back to Saddleback lake.
[
Click to View Linked Image]
Traveling towards East Ridge
After couple more hours of slogging down we ended up at our camp, two hours earlier than the rest of the people in our group.
[
Click to View Linked Image]
Route
I give this route 5 stars based on solid rock, great segments of exposure, fun climbing, beautiful scenery, and of course awesome partners. Peter Croft was right to include this route in his top 40 Sierra climbs. After such a great experience on # 1 out of 40 I might have to pick several more routes straight out of his book, or maybe at some point complete the whole list! However, for now I need to get away from dreaming, and back to training!
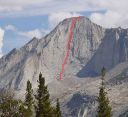
Follow the ridge, pass the 1st tower on the left side, continue up to 2nd tower, down climb/rap down to the saddle, and take 4th/low 5th class way to the summit
Tips
*Leave early enough to have a full day for this route. Our party finished fairly early, but another team of two from our group ended up getting back to camp at 2AM (because their tent-mate didn't let me know they were back I actually ended up leaving camp at 4:30am and hiking to the north ridge again to look for them. At least I took some great sunrise photos), without even making it past 1st tower. They got lost on the way up(even though perfect maps, and directions are available), didn't even bring a watch (which resulted in getting lost again on the way down).
*Know how to use a map & compass
*Bring a watch and try to be on your way back to camp about two hours before sunset
*Just in case have a bit more water/food/clothes available in case you do get lost and need to spent a night on the ridge (bivy spots with great views on to Conness glacier are readily available!)
*Be careful and don't climb anything that looks above your level of comfort.
*In case you are not comfortable to solo terrain up to 5.6 bring a rope/protection (know how to use it).
*Make sure you and your partner are on the same page
*It is not often you are on a classic Sierra route, ENJOY IT!


