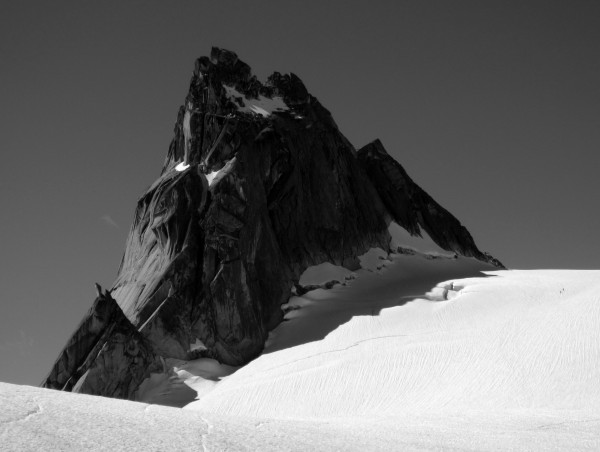
After having a great climb on Gimli Peak in the Valhallas, Alec and I were ready to head over to the Bugaboos, despite the uncertain weather, to try our chances at climbing some world class classics. While we had hoped to warm up on some easier climbs, the forecast called for a solid 2-3 day weather window the day after our arrival. We would need this break for climbing Beckey-Chouinard, so we decided to do it first. Our plan was to set up camp at Applebee our first day (which had questionable weather), then the second day approach and set up a bivy near B-C. The bivy would take us close enough to the short West Ridge of Pigeon Spire that we would climb that while in the area (HIGHLY recommended!).
2013-07-28 to 29 - Drive and Approach
The first day we hiked out from the Valhallas and drove up to Revelstoke, where we slept roadside.

Visit on googleusercontent.com
On the drive from the Valhallas to the Bugaboos, there is an unusual part where you have to wait and take a car ferry across the massive inland reservoir. We had to wait nearly an hour, but it gave us time to relax on the drive.
The next day was rainy as we drove to the Bugaboos trailhead, but it cleared up just long enough for us to enjoy a cool and dry hike to the hut. Just after we reached the hut, the weather deteriorated again.

Visit on googleusercontent.com
Alec and the packs are ready to go on the steep stairstepping approach to the Bugaboos. Wire mesh is in place on the car to keep those pesky rubber-eating porcupines away from the tires. Note the corral beside us filled with chickenwire for this purpose.

Visit on googleusercontent.com
Map of the Bugaboos Area. While not too large, there is a lot of world-class climbing to be found here. (click to enlarge)
The trail, while short and starts out flat, has a pretty grueling grade, so be ready for some exercise getting to camp. Still, it is only 2.9 mi and 2,700' gain to the Kain Hut, so if you keep up a good pace, it is over with before too long.

Visit on googleusercontent.com
Talk about red carpet treatment crossing the wooded marshes!

Visit on googleusercontent.com
Getting higher on the trail, with some early views of Hounds Tooth (left) and the aptly named Snowpatch Spire.

Visit on googleusercontent.com
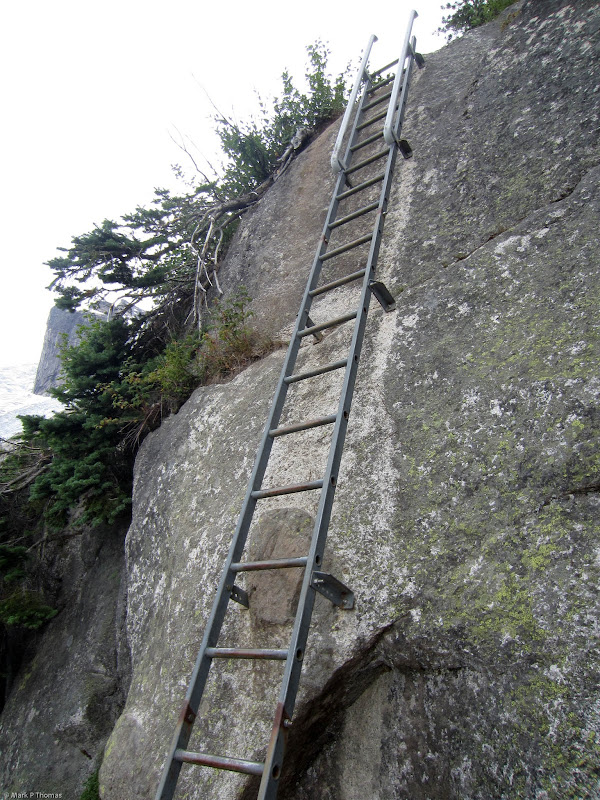
The trail gets a bit more exposed here, but really, is this necessary?
Visit on googleusercontent.com
They really don't want you to work too hard to reach the Bugaboos :-P

Visit on googleusercontent.com
Chains and mortared steps ease passage up the slabs.
I kept up a fast pace, and even with my full multi-day climbing pack (including the 6-pack of beer), I still made it to the hut in about 1:30 hrs. Alec followed behind at a more leisurely pace, so while I waited, I looked over the hut and checked in with the ranger about campsite registration and currently acceptable bivvies for climbing the Beckey-Chouinard route.

Visit on googleusercontent.com
The Kain Hut at last. I was going to wait for Alec here and then we were going to camp at Applebee, but as soon as he arrived a torrential sleet storm started. Fortunately there was just enough room for us in the hut, so we settled in for an easy night here.
2013-07-30 - West Ridge of Pigeon Spire
Our first real day in the Bugaboos, Alec and I hiked from the Kain Hut up to Applebee Campground where we set up camp, which was another 30-45 min hike up the trail (0.87 mi and 900' gain). From there we climbed over Bugaboo-Snowpatch Col to set up our bivy by Pigeon Spire to position us for climbing the Beckey-Chouinard route on South Howser Tower the next day. Of course, while in the area we climbed the classic West Ridge of Pigeon Spire! (II, 5.4) We brought a rope and light rack but never felt a need to use them, even for the two optional descent rappels - the only exception being that we belayed the final 5.4 downclimb below the summit, but found it easier going down than up.

Visit on googleusercontent.com
The classic West Ridge of Pigeon Spire, seen from atop South Howser Tower.
Visit on googleusercontent.com
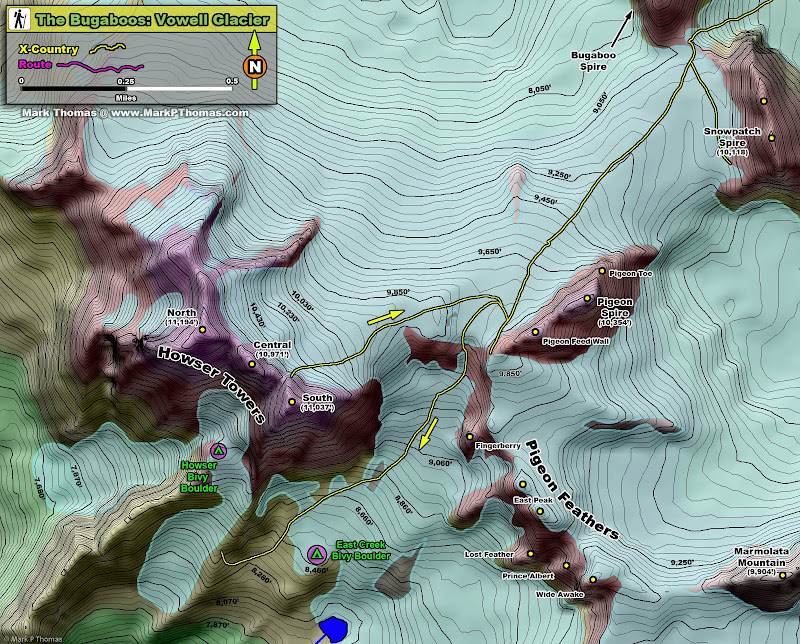
Map of the Howser Towers and areas accessed from Bugaboo-Snowpatch Col
Visit on googleusercontent.com
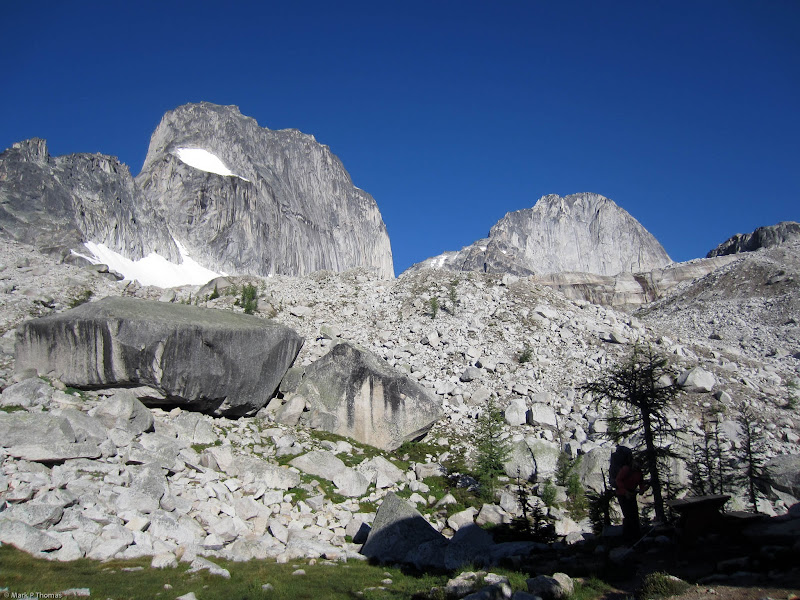
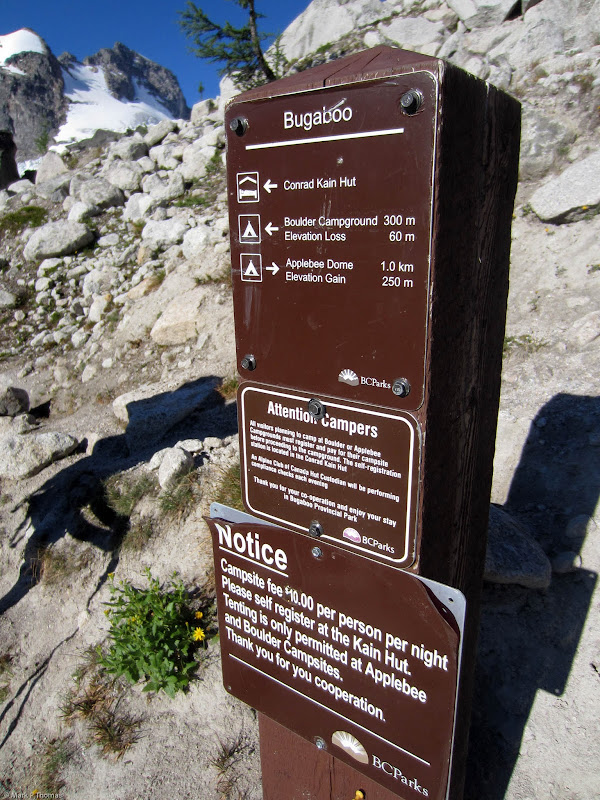
Snowpatch and Bugaboo Spires seen from the Kain Hut.
Visit on googleusercontent.com
Onward to Applebee Campground! Since we indulged and stayed at the hut, we had to hike up to the campground and set up camp before continuing our approach to our bivy by Pigeon Spire.

Visit on googleusercontent.com
Panorama from our tentside, with Hounds Tooth (far left), Marmolata, Snowpatch Spire, and Bugaboo Spire visible.

Visit on googleusercontent.com
Bugaboo Spire.

Visit on googleusercontent.com
Looking towards Bugaboo-Snowpatch Col as we approached it via the lakes above camp.

Visit on googleusercontent.com
Bugaboo-Snowpatch Col. This col is steep and potentially hazardous, but when we were there, good steps were kicked and the snow was soft, so it was very easy! Rockfall took out rappels on the right, but new stations have been added on the smaller rock peninsula extending down

Visit on googleusercontent.com
Panorama from Snowpatch-Bugaboo Col. Left to right are Snowpatch Spire, Pigeon Spire, and the 3 Howser Towers (South, Middle, North)

Visit on googleusercontent.com
Climbers on the Vowell Glacier. This glacier was quite tame - Alec and I never felt the need to rope up, and an axe isn't even really needed! Crevasses are present, though, so certain conditions might warrant a rope, especially the bergschrund crossing for reaching the Bugaboo-Snowpatch Col.
Visit on googleusercontent.com
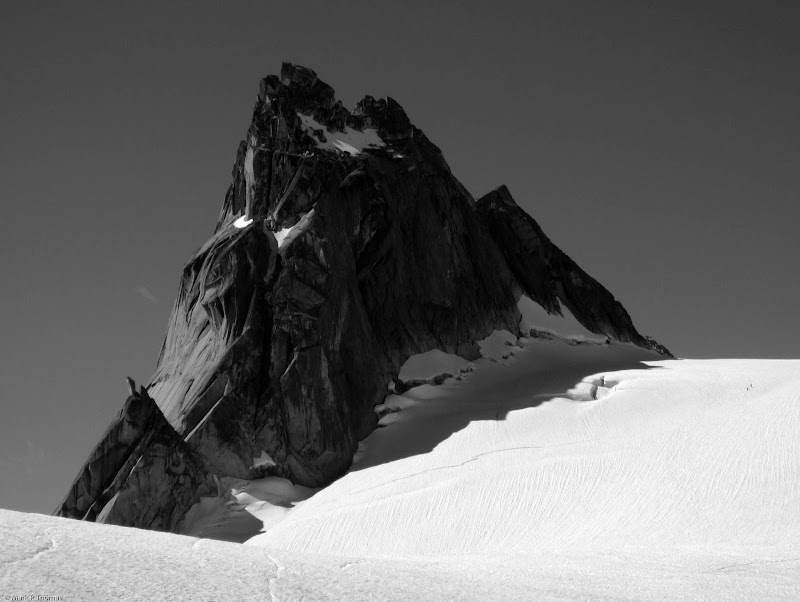
Pigeon Spire. The smaller spire below is called 'The Gooseneck".
Visit on googleusercontent.com
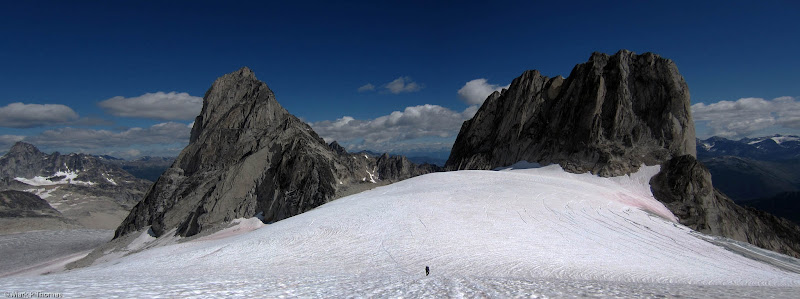
Panorama looking back towards Bugaboo-Snowpatch Col, with Alec following behind.

Visit on googleusercontent.com
Mark on the glacier, headed to Pigeon Spire. (by Alec LaLonde)

Visit on googleusercontent.com
Guide and client descending the West Ridge of Pigeon Spire. Little did we know that there were over a dozen other climbers heading back along the ridge!

Visit on googleusercontent.com
Starting up the West Ridge of Pigeon Spire. We decided to start out unroped and then rope up once it got hard or exposed enough.
In the beginning there is a step that one must climb, that might be one of the more typical rope-up sections. However, the move requires climbing up to an arete and making some weird arete-face climbing moves without pro, so a rope wouldn't help much if you fell on the tricky part. However, when we downclimbed, we found an OW that was plenty easy to downclimb. It would be harder than the standard way to climb up, but you are more secure against a fall if soloing.
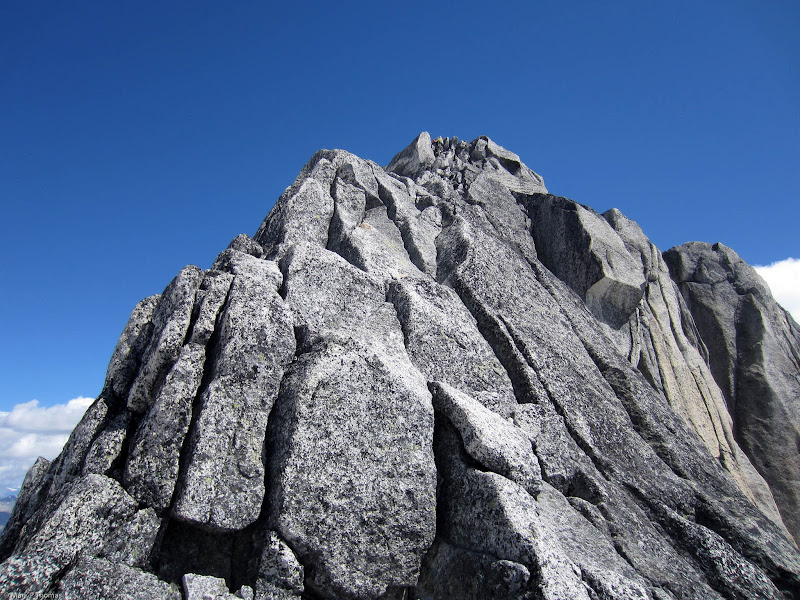
Above this lower step the climbing drops to cl. 2-3.
Visit on googleusercontent.com
Heading into more of a jumble, on the worst rock of the route (but still quite good!). You can see the first of many climbers starting down from the top.
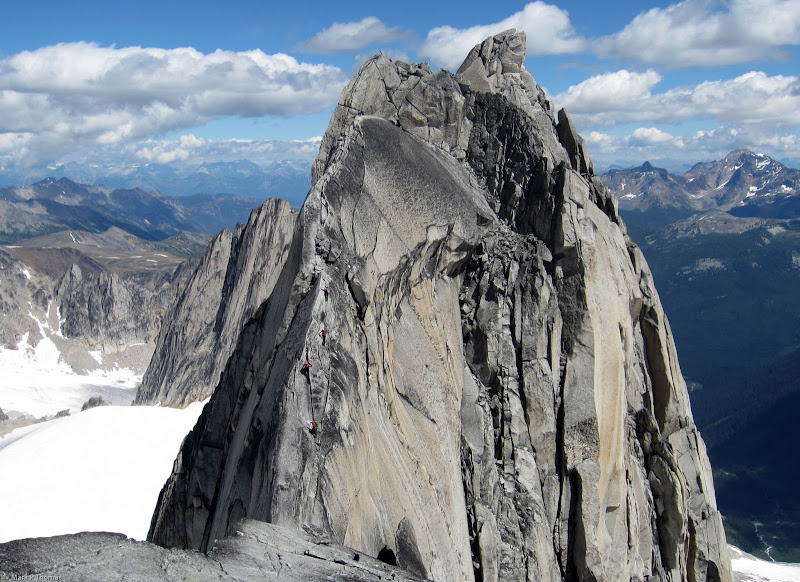
Visit on googleusercontent.com
Another "Wow" moment on the West Ridge. The summit is the one on the right. See the other climbers downclimbing the next section?
After topping out on the first highpoint, you descend an exposed cl. 2-3 slab to a notch. From there you can choose between two grooves to climb up, which are both about cl. 4. The left one is a bit tougher but less exposed.
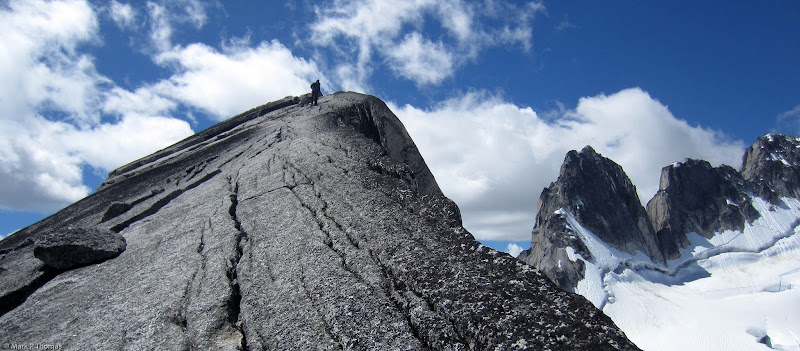
Visit on googleusercontent.com
Alec following down one of the many picturesque sloping slabs.
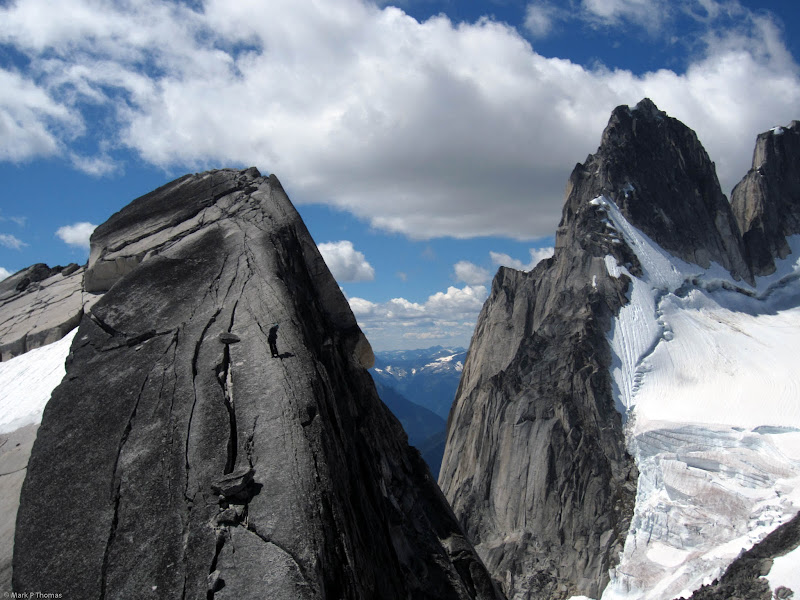
Visit on googleusercontent.com
Alec following down one of the many picturesque sloping slabs.

Visit on googleusercontent.com
Alec following on the narrowest walkable knife edge sections of the ridge. Time for a photo-op!

Visit on googleusercontent.com
Nearing the first summit, with the higher one beyond. We would have to downclimb and traverse around the left backside of it to summit.
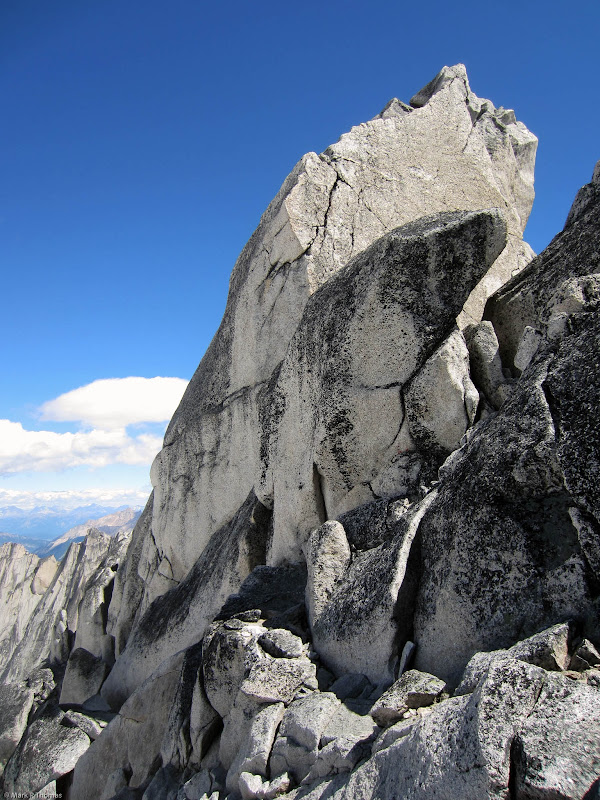
Visit on googleusercontent.com
Traversing on ledges around the north side of the summit. Climb into the chimney on the lower left to pass around to the final 5.4 slab and finger crack.

Visit on googleusercontent.com
Looking back at the sub-summit and what I thought was the real crux of the route. Downclimbing that wall was pretty tricky, although I took a harder way down than Alec, and found his way easier on the way back.

Visit on googleusercontent.com
Rounding the summit towards the east side.

Visit on googleusercontent.com
Looking down the 5.4 slab and finger crux before the summit. This was a little spicy to solo and we belayed each other on the downclimb, although the downclimb turned out to be easier!

Visit on googleusercontent.com
Alec celebrating on the summit of Pigeon Spire. I took this shot from the rappel chains on the sub-summit.

Visit on googleusercontent.com
Snowpatch Spire seen from atop Pigeon Spire.
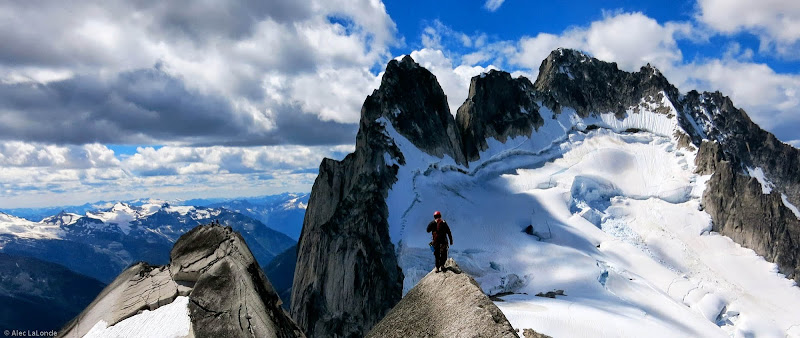
Visit on googleusercontent.com
Headed back, the ridgeline money shot (by Alec LaLonde)
Soloing went fast enough that we caught up to most of the climbers that we had passed on the ascent. Fortunately the terrain offered enough options for us to easily pass them. There was a large bottleneck of climbers at the final rappel, and while I didn't like the idea of downclimbing the tricky crux here, I didn't want to wait in line either. I spotted an OW/squeeze chimney crack below that would do just fine. For those familiar with wide climbing, usually the crux is moving up, but wide can be quite secure for plugging yourself in, and downclimbing by gradually releasing and letting gravity pull you down. This made for a quick and relaxed downclimb of the final step.
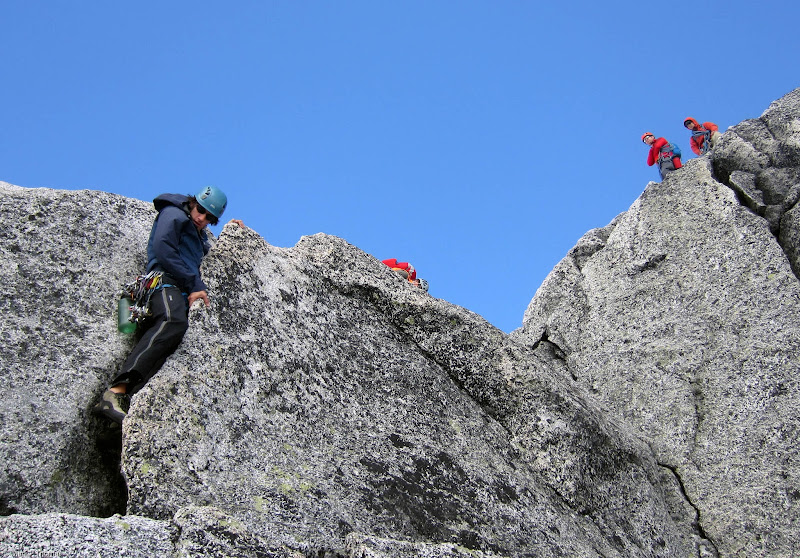
Visit on googleusercontent.com
Alec bypassing the gridlock at the second rappel station.

Visit on googleusercontent.com
Climbers at the second optional rappel for the descent of the West Ridge of Pigeon Spire.
The climb only took us a leisurely 1.5 hours round trip and was well worth the detour. We had plenty of time to get out here, do the climb, and set up our bivy and get some rest before our main objective for the next day: the Beckey-Chouinard route on South Howser Tower.
Notes:
While disappointing if you are looking for a technical climb, the West Ridge of Pigeon Spire is a mega-classic for its striking positions, spectacular photo-ops, and high quality granite. It falls somewhere in between being a scramble and a technical climb, so if you are proficient on this terrain, it is an easy solo (took us 1.5 hrs round trip), and if you are not, it can be done roped up.
Perhaps the ideal way if you are moderately proficient at trad is to rope up for a few short cruxes, then solo or simul-climb the rest, and possibly use the rappels on the descent. These sections are the first step, perhaps climbing out of the notch, downclimbing the first sub-summit, and the final pitch ascending from ledges around the summit block to the top.
Another thing that makes this climb a great one to include on your Bugaboos list is that it can be a good rainy day climb - although you might want a rope in more places when the rock is wet. There are enough rainy days (or 40% POP) days in the Bugaboos that easier and shorter climbs are important to have on your list to still get out and about, get some exercise, and enjoy the range. The three most popular ones seem to be Marmolata, West Ridge of Pigeon Spire, and cragging routes on Crescent Tower or McTech Arete areas. The South Ridge (Kain Route) of Bugaboo Spire also seems to be a good one in this respect, and can serve as a means of getting familiar with the descent if later planning on doing the NE Ridge - this descent would be very difficult to follow your first time if it is done in poor visibility (clouds, darkness).
Photo Album Links:
Picasa Album - Bugaboos Approach
Picasa Albumm - W Ridge of Pigeon Spire
Personal Website
Other Bugs/BC Rock Climbing Trip Reports
South Ridge of Gimli Peak - A Lesser-Known Canadian Classic
-
South Howser Tower (Beckey-Chouinard)
Crescent Tower (Lion's Way) - A Great R&R (Rain & Relaxation) Climb
Bugaboo Spire (NE Ridge)
